
Lauren Malhoit
Ansible, GitHub, and Micetro
Want to start using Ansible to manage your DDI environment? Micetro has a plug-in for that!
Dec 22nd, 2022
If you are already using Ansible to build automation into your environment or you want to get started, then you've come to the right place! In this series of blogs we'll talk about how you can install Ansible and then use Ansible to create DNS, DHCP, and IPAM workflows. Let's get started with some simple definitions:
Ansible Control Host - Simply the Ansible server which allows you to automate workflows for your environment. Ansible will make connections via SSH to devices on your network to send commands which will automate your network and ultimately build consistency in. Consistency leads to more uptime and decreased troubleshooting time.
The Ansible Control Host doesn't have to be an official server.
Install Ansible on your control machine
It's easiest to do this on Linux, so we'll be using an Ubuntu Linux VM, but it is possible to do on Windows using the Windows Subsystem for Linux or Windows SSH, though it's still listed as experimental. For distro specific documentation you can use the Ansbile documentation here: https://docs.ansible.com/ansible/latest/installation_guide/installation_distros.html#installing-ansible-on-ubuntu
- Open a terminal or SSH to your machine
- Run the following commands:
$ sudo apt update
$ sudo apt install software-properties-common
$ sudo add-apt-repository --yes --update ppa:ansible/ansible
$ sudo apt install ansible
Now if you're just using the terminal on your local machine, you may not have OpenSSH installed. Ansible does require OpenSSH, so make sure you install it using the following command:
$ sudo apt install openssh-server
Using Git and GitHub
Next, we'll install Git for version control and storage of your code. To install git run the following:
$ sudo apt update
$ sudo install git
If you have an account on GitHub already, then great, if not go ahead and create one at GitHub.com. Now we'll fork the Micetro Ansible repo to create our own copy on our own account.
- Go to https://github.com/menandmice/ansible_micetro
- Click on Fork in the upper right
- This will create a copy (or fork) on your account
- Click on Create Fork
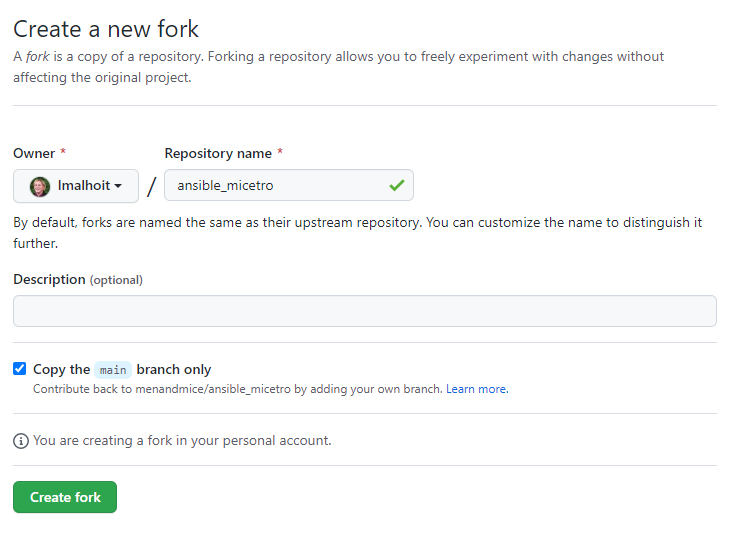
Now that we have our fork, we can make whatever changes or additions we want as the owners of this copy of the ansible_micetro repo. We'll be able to use the examples given, as well as add our own playbooks.
Add Fork to Ansible Host
Now that we've forked it, let's go ahead and add it to our Ansible Host (where we installed Ansible above).
- In GitHub, on the owner/ansible_micetro repo page still, click on the Code button and select the HTTPS option
- Click to copy the repo site
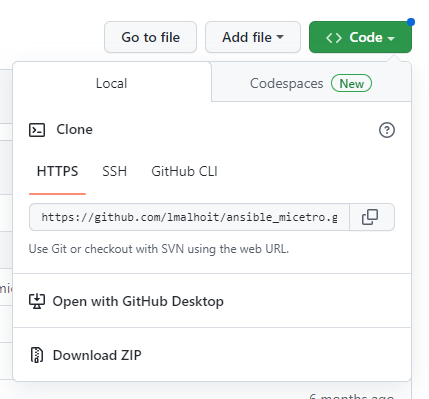
3. Go back to your Ansible Host and type (where owner-name is your GitHub accout):
$ git clone https://github.com/[owner-name]/ansible_micetro.git
4. Check to make sure it pulled down the repo by typing:
$ ls
You should see a directory called "ansible_micetro."

5. CD into that directory by typing:
$ cd ansible_micetro/
Type the following to avoid errors in the future and give Git the information it needs to make changes in the future.
$ git config --global user.name "Lauren Malhoit"
$ git config --global user.email "lauren@menandmice.com"
Now let's make some changes to our forked repo to so we can be sure everything is working.
So we're still in the ansible_micetro directory on our Linux machine.
Type ls to see a list of what's there:
$ ls

Using a text editor we'll edit the README.md file. I prefer nano, but use what you know.
$ nano README.md
Edit the file by adding in something meaninful for you, like "First edited on [this date]."
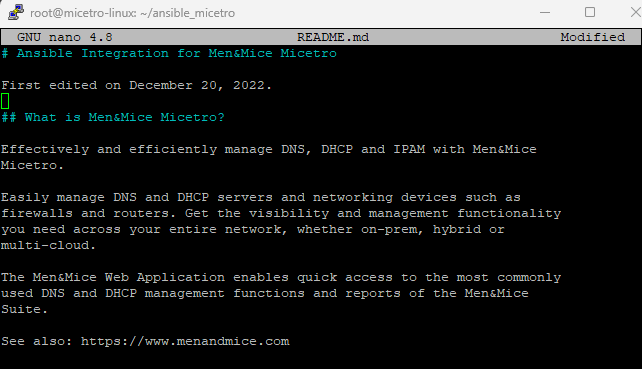
Then select CTRL + O and ENTER to save and CTRL + X to exit the editor.
Now of course this change only exists on your local machine, but it doesn't yet exist in your GitHub repo because we haven't pushed the changes. So let's go ahead and push those changes from your local machine using git.
$ git status
This shows you what's been changed and so it should say in red "modified: README.md"
$ git diff
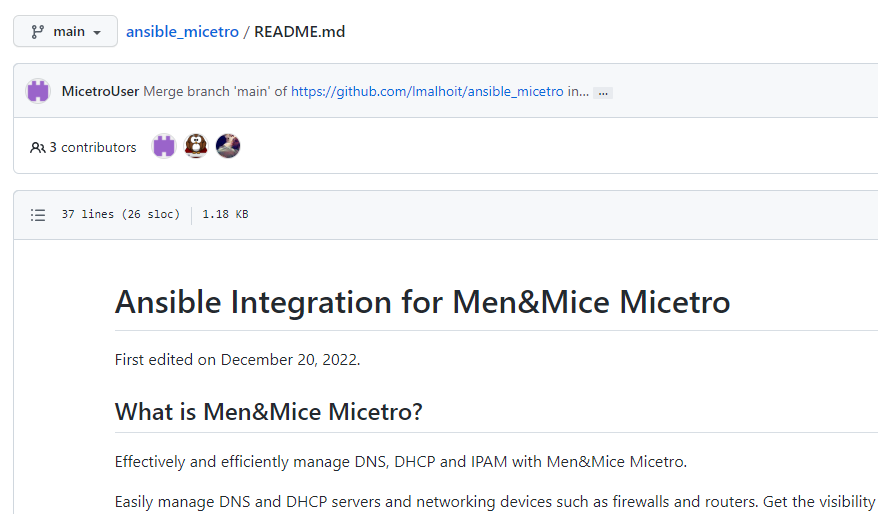
Git diff will show you what has actually been changed, which in the case above shows in green "First edited on December 20, 2022."
$ git add README.md
This adds our changes to what we want to commit. So now if you run "git status" again, it will show the "modified: README.md" file in green instead of red.
$ git commit -m "updated README.md"
$ git push origin main
This actually does the work of committing our changes to the README.md file and then pushing it up on GitHub. So if you go look at GitHub now, you should see this change.
Note: If it asks you for a username and password, you now have to use a personal token instead of passing your password through an https remote. More information can be found here.
Coming Up Next:
In the next blog in our Ansible series, we'll be diving into using Ansible now that we have everything setup. We'll create an inventory file to connect with Micetro and start using Ansible for running ad-hoc commands. To get started now, you can follow the README.pdf here: https://github.com/menandmice/ansible_micetro/blob/main/docs/README.pdf
If you'd like to give this a try on your own, download our Free Trial and watching our Deployment Playlist on YouTube to get started in a matter of minutes.
